


At the end of a fantastic four nights stay at the &Beyond Sossusvlei Desert Lodge in Namibia in 2013 which capped a wonderful two weeks of safari in Botswana and Zambia, the management suggested that they would like to add me to the ranks of the resident astronomers who share the wondrous dark skies of the NamibRand nature reserve with the guests of the lodge. I of course said I would be delighted but suspected it might be part of some goodbye pleasantries. Turns out they were serious. The email came less than 7 weeks after I returned to the UK. A two week gap had opened up in September 2014 due to a family commitment. I jumped at the chance. A full two weeks under those skies, coinciding with a New Moon would be the cause of envy for many amateur astronomers.
While the lodge boasts an excellent computerised 30cm (12”) aperture telescope, the focal length of over 3 metres means that wide-field observing is not possible which is a terrible shame as the Milky Way and its numerous star clouds are resplendent under such dark skies. I decided I wanted to take full advantage of night sky and began putting together an airline portable telescope and related accessories which could achieve wide-fields to compliment the telescope at the lodge. I also wanted to capture the night sky photographically as well. The amount of equipment I would take started to build up.
In my haste to book flights I did not look that closely at the cabin baggage allowance of the Air Namibia flight that would carry me from Johannesburg to Windhoek nor really consider the Cessna 210, a small 6 seat aircraft that would transfer me from the capital of Namibia 300km south to the lodge. While the Air Namibia maximum weight allowance of 10kg and the length and width of 55cm and 38cm would be sufficient, the depth of only 20cm (7.9”) presented me with a problem as I had no compliant bag to carry all the equipment. I did not want to risk that the overhead bins were particularly shallow and find my bag containing thousands of pounds of fragile optical equipment being placed in the hold and left in the “capable” hands of baggage handlers.
Learning of the baggage restrictions only a few weeks before departure left me scrambling to find a solution. Via Twitter Think Tank Photo recommended their Airport Essentials Backpack, the smallest of their Airport Backpack series. They were confident it would meet my requirements. First hurdle crossed. However, finding one in the UK in August 2014 proved tricky. Every retailer I checked was out of stock but expected a delivery within weeks. Time was growing short and panic was beginning to set in when I found what seemed to be the last bag in the country via London Camera Exchange. The price was £136. It arrived two days after I placed the order.
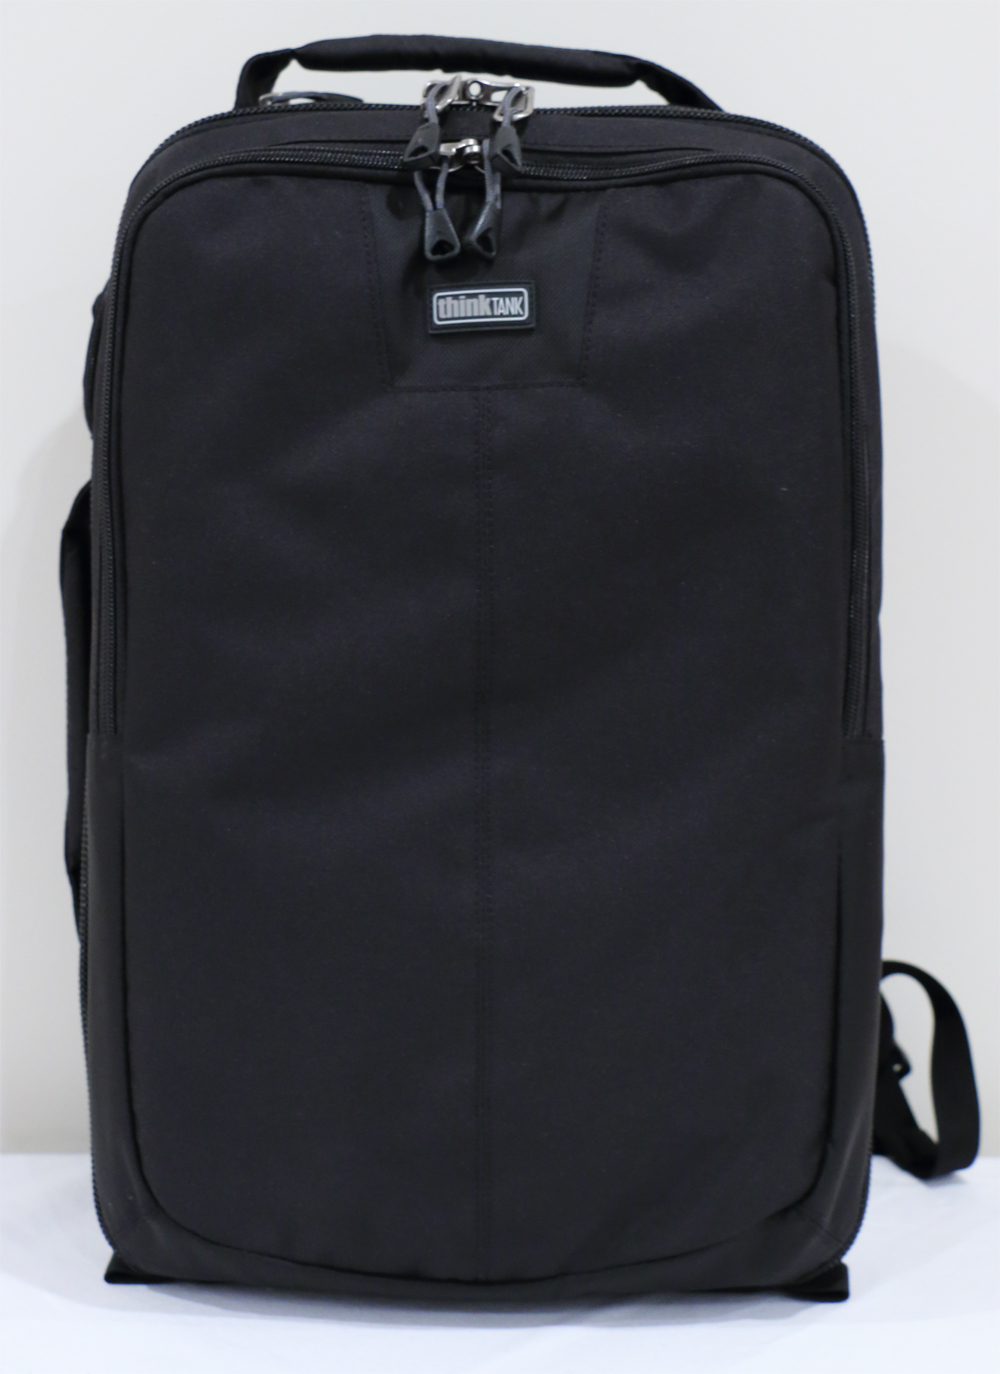
The Think Tank Airport Essentials Backpack is the smallest backpack in the Airport Series.
While the Airport Essentials bag is not going to win any beauty pageant contests (the Streetwalker series are Think Tank’s best looking backpacks in my opinion) it is clear that it is very much a case of function over form with high quality materials being used in its construction and plenty of thoughtful touches and features added which increase the utility of the backpack. To the untrained eye, the Essentials is very unassuming, appearing as a regular backpack, leaving no one any the wiser that valuable equipment may be stored inside. Incognito is always a big plus as far as am I concerned.
With outside dimensions of only 18”x11.5”x7” (45.7×29.2×17.8cm) the Essentials will comply with the most stringent of airline cabin baggage allowances and comfortably fits under the seat in front of you if no overhead space is available. Having now taken the bag to Namibia, Slovenia and Spain, the backpack has not drawn the attention of any airline staff. Depending on the internal configuration and number of padded dividers used, which are fully customisable, the weight of the backpack ranges between 1.4 and 1.6kg (2.9-3.6lbs) which leaves plenty of excess weight capacity for your equipment.
Apart from the two primary reinforced dividers which will run the length of the bag, all the provided dividers are thinner than those that came with my Think Tank Airport Security V2 but given the internal dimensions (16.3”x11”x5” / 41.4×27.9×12.7cm) that is unsurprising and they still do a good job of immobilising and protecting your equipment. I have to confess when I laid all the equipment I wanted to take with me to Namibia in front of the bag for the first time, I was rather concerned it would not all fit, but I need not have worried.

The equipment I took to Namibia. Not shown is my iPad Mini.
To give a sense of scale to all the equipment, the Takahashi FS-60 telescope is 30cm long with a barrel diameter of 8cm. Including the lime green clamshell and dovetail bar raises the height to 12cm.
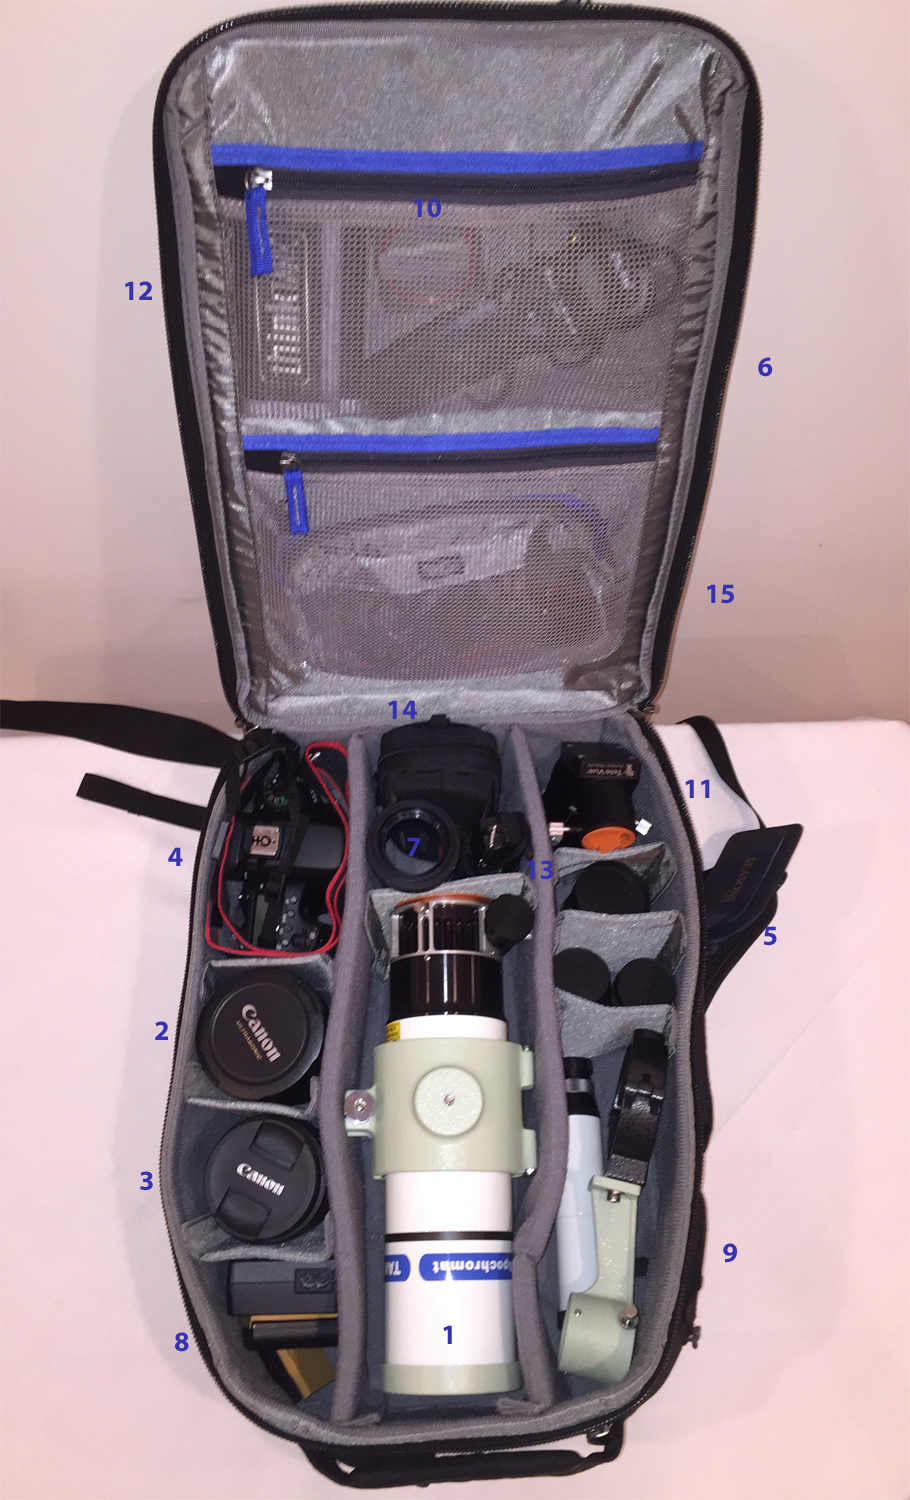
The same equipment packed inside the diminutive Airport Essentials Backpack.
The outside of the lid contains a large compartment which will hold a 15” laptop and an iPad in separate pouches. While I do use the iPad pouch for my Mini, I tend to carry star-charts and other books in the front pocket instead of a laptop.
On the underside of the lid are two mesh pockets which have proven useful for holding cables and other small items though I would have preferred the clear plastic pockets found in my Airport Security V2.0 rolling camera bag as the jack from my intervalometer has poked through more than once with the potential to scratch the equipment stored in the bag. A small zipped pouch is located under the main handle on top of the bag allowing easy access to travel documents without having to open storage pockets. I do appreciate all the little pockets and pouches dotted over Think Tank bags. There is always something among the carried equipment that can be squeezed into them.
My favourite feature which seems to be replicated on many of the Think Tank bags are the carrying handles on three sides of the bag. Both the top and side handles are thickly padded and comfortable to hold for extended periods. On the bottom of the bag is a thin, strong nylon strap. Having three handles always makes the task of lifting the bag into an overhead bin in an aircraft a simple task.
A backpack containing as much as 10kg of equipment will not be fun to use for extended periods if it is uncomfortable. Fortunately this is an area that the Airport Essentials passes with flying colours. Both shoulder straps are well padded and easy to adjust and the lumber support on the underside of the bag along with Air Mesh panelling allows air to flow down the back, keep you cool. Having carried this bag around in the NamibRand desert where temperatures exceeded 40C I can confirm it works well.

The Essential straps are well padded and the lumber support and air mesh keep your back cool even in extreme temperatures.
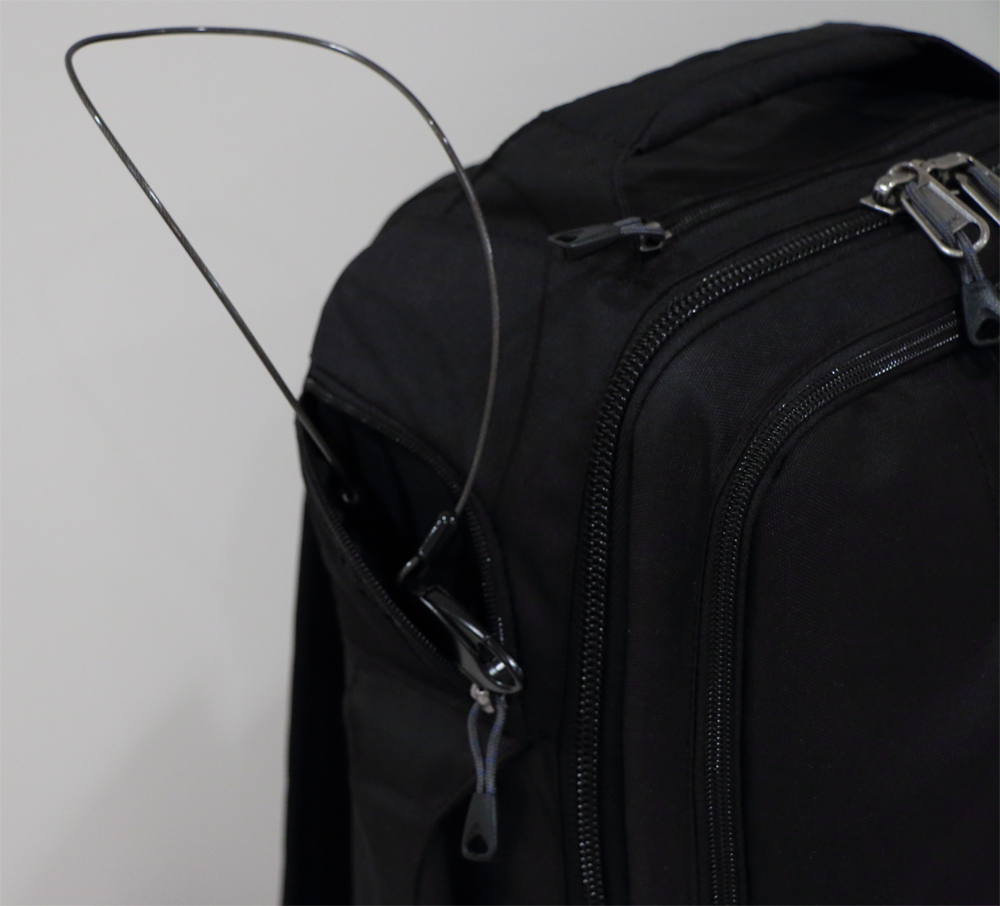
The built in lock and cable allow the bag to be attached to an immovable object and is a great theft prevention measure.
Security of the bag has also been considered. As well as the ability to simply lock the zipper sliders together, there is a built in lock and cable in a small pouch located above the handle on the side of the bag which can be used to immobilise the bag by securing to an immovable object. While a determined thief may well be able to cut through the wire, it will stop any opportunist who just tries to walk off with the bag. Having the cable lock has certainly left me feeling more comfortable about briefly leaving the bag unattended in airport lounges.
Think Tank Photo’s social media manager was correct. The Airport Essentials backpack has proved to be an excellent choice, carrying all the equipment I wanted to take while complying with the restrictive cabin baggage allowance on my trip. It is comfortable to use for extended periods and due to the high quality materials used, I am not worried about the bag failing if I overload it. I now use this bag to transport the Takahashi FS-60 when I attend domestic astronomy events as well as well as on my international travels. If you are looking for a small, well made, unassuming cabin bag which can meet any allowance to carry your equipment, the Airport Essentials is well worth considering and comes highly recommended.
Pingback: Takahashi FS-60 Review | Alpha Lyrae
Pingback: Takahashi FC-76 DCU Review | Alpha Lyrae
Pingback: Takahashi FS-60Q Review | Alpha Lyrae
Pingback: Stargazing on Vamizi Island Part One | Alpha Lyrae
Just wanted to say thanks for this review. I’ve been agonising over which bag to get and kept coming back to the Airport Essentials. I also wanted it for a travel scope so really helped to see your photos of everything packed in. I’m finally settled on buying this one. Thank you.