


If a telescope is to perform at its best, all the optical elements must be in alignment, and in a Schmidt-Cassegrain with its magnifying secondary mirror (typically a 5x optical element), even a slight misalignment of the primary and secondary mirrors can result in a terrible image, well below what the scope is capable of delivering.
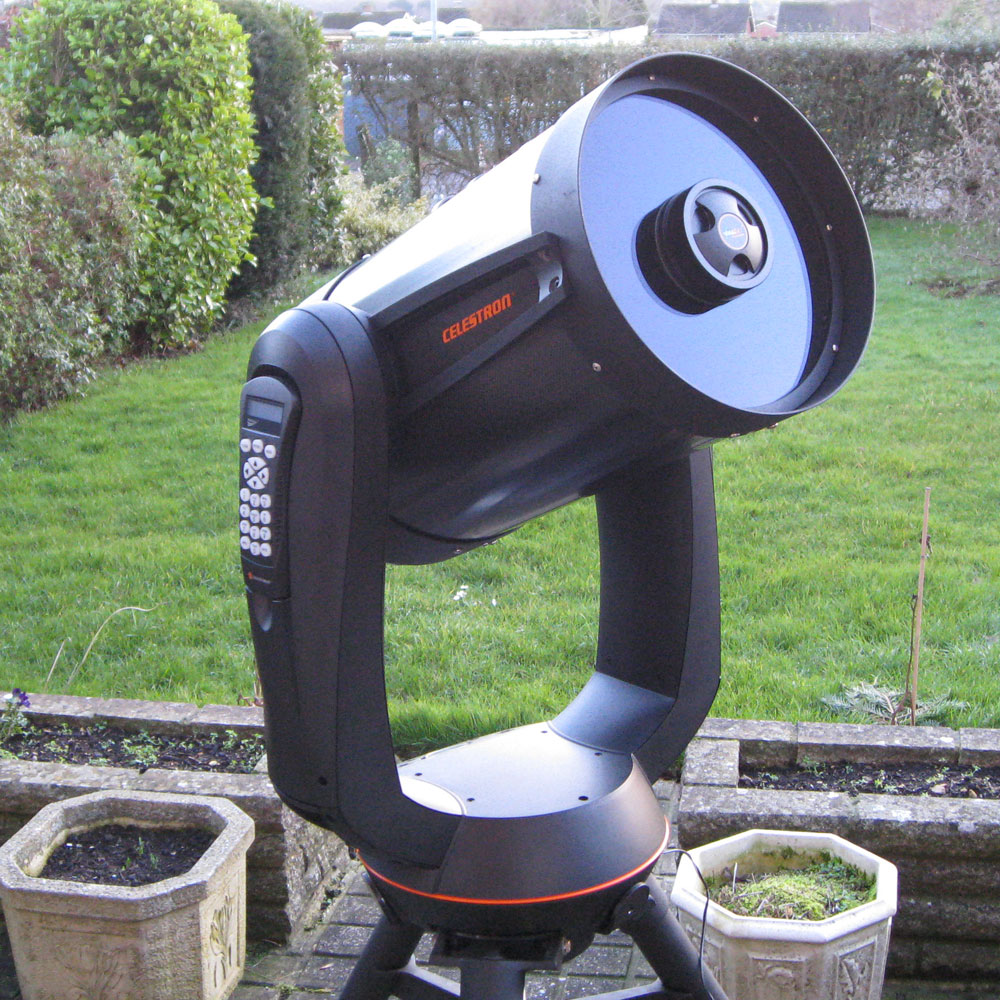
My 11″ Celestron Nexstar 11 GPS Schmitt Cassegrain
Over the Christmas holiday 2013, I was presented with an opportunity to use my largest aperture scope, the 11” Nextstar 11 GPS Schmidt-Cassegrain. This scope has not been used in a couple of years and despite sitting safe and sound under a cover in the house, I found that the scope was terribly out of collimation when I went to use it. Collimation with a Schmidt-Cassegrain is relatively straight forward exercise of adjusting the three collimation screws on the secondary mirror until the shadow of the secondary mirror appears in the centre of a defocused star image (typically I use Polaris for this exercise) and then fine adjusting so the diffraction rings in a slightly defocused star are concentric. However, I sometimes get confused about which screw needs to be tightened/loosened, which results in running back and forward around the telescope making adjustments, and I am often left wondering if I have really aligned the optical elements precisely as it is a judgement exercise. With the extra time afforded to me by the holiday break, I decided to make a simple aid that removes that ambiguity from the process, a full aperture Duncan Mask.
How to make a Duncan Mask
A few items of equipment are required to make a Duncan Mask including a circular cutter, a Stanley knife and a protractor, as well as piece of cardboard or other suitable material that can be cut precisely. I picked up my circular cutter from Amazon.
The first step is cut out a circle of card which will mask the entire aperture of your SCT using your circular cutter. The second step is to draw lines across the circle at 60o intervals using the protractor.
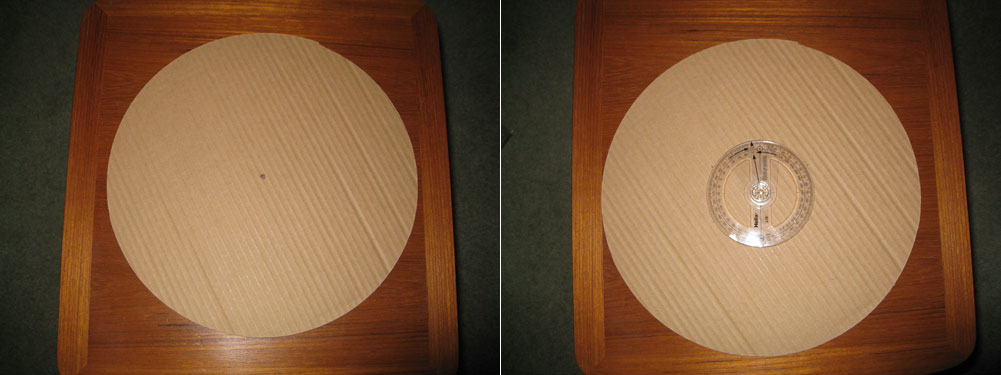
Left: Step 1 is to cut a circle that fully masks the aperture of your SCT. Right: Step 2 draw lines across the diameter separated by 60 degrees
The third step is to cut alternate 60o segments of the outer diameter circle (which matches the diameter of the corrector plate as opposed to the diameter of the telescope tube) three times, before reducing the radius of the circular cutter to cut the same three inner 60o segments. When this is done, using a Stanley knife and ruler, cut along the 60o radial lines to join the outer and inner cuts so you are left with three windows in your mask as seen in the photos.
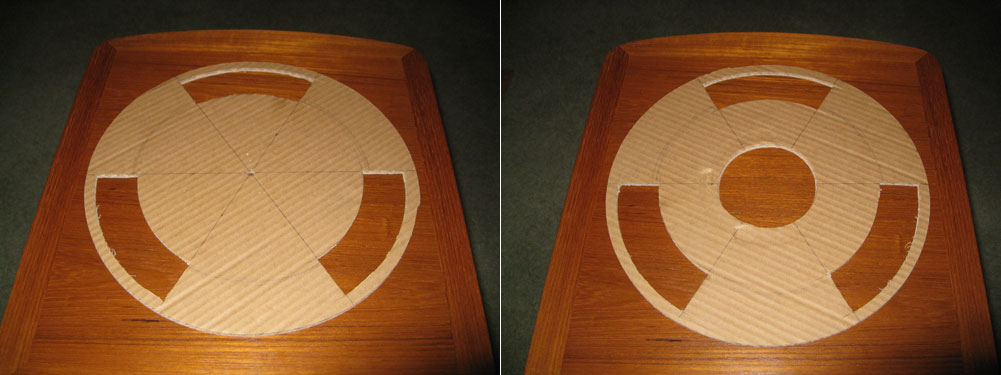
Left: Step 3 is to cut the 60 degree windows. Right: Step 4 is cut the central hole to reveal the secondary mirror holder and allow access to the collimation screws.
The final step is to cut an inner complete circle a little larger than the secondary mirror so you are able to access the collimation screws. I added a strip of card perpendicular to my Duncan Mask so it will be held in place much like the front corrector plate cover that came with the scope.
Using a Duncan Mask
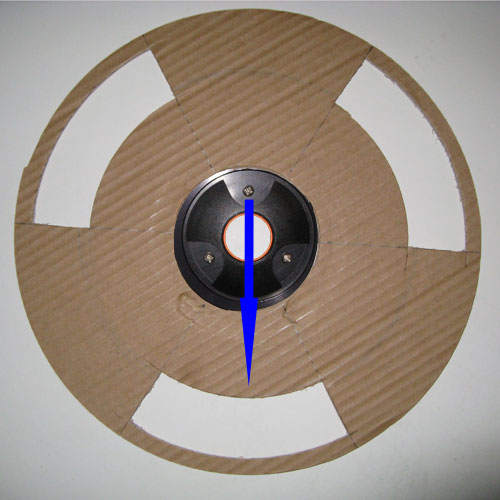
Correctly position the Duncan Mask so each collimation screw is opposite a 60 degree window as indicated by the arrow
It is important to allow the scope to come to thermal equilibrium before collimating. Internal tube currents will make the job of collimating a SCT almost impossible. Point the SCT at a fairly bright star as you would for the normal collimation method. You should have the scope set up as you would for normal use. For example, if you use a mirror diagonal, this should be used during collimation. The Duncan Mask is placed over the front corrector plate, such that each collimation screw is opposite one of the 60o window cut outs. To successfully undertake this method a high magnification in the 400x range is needed. A Barlow can be used if you lack a sufficiently short focal length eyepiece.
When the scope is far from focus, you should see three curved lines of the window cut outs, much as in the accompanying diagram 1. As you adjust the focus of your scope, you will see the three lines flip so they are pointing towards a common centre though there is likely to be gaps between them (diagram 2). Each line corresponds to its opposite screw so adjust each screw which will nudge in line towards the centre with the ultimate aim of forming a capital “Y” in the eyepiece. When you achieve this you have successfully collimated your SCT (diagram 3). To reach perfect focus with the mask still attached, focus until the three lines cross over each other forming a little six point star (diagram 4). You can now remove the Duncan Mask and you will see a nice tight airy disc with an even, well defined diffraction ring.
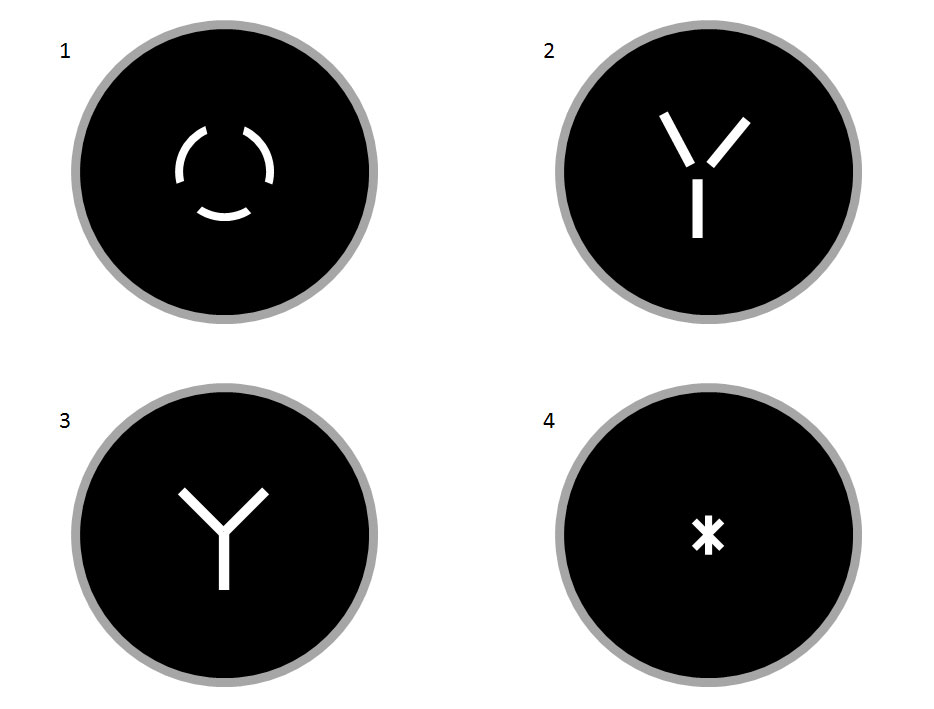
1) Image seen upon placing Duncan Mask on SCT. 2) Adjust focus and 3 straight lines are seen. 3) Adjust collimation screws to form a capital “Y”. 4) Perfect focus achieved.
Once the mask was made, the process of collimating took just a few minutes and the performance of my SCT was excellent after. I particularly appreciated the lack of ambiguity over which screw I should be adjusting and a clear pattern to look for in the capital “Y” to know when I had the scope collimated. I shall certainly be using the Duncan Mask in the future every time I want to check the collimation.
Thanks for your well written construction article for the Duncan Mask. Finished one yesterday and hope to test it tonight.
Thank you so much!!!! This worked fabulously. Perfect collimation. Beautiful diffraction rings in 10 minutes. I wish I had seen this page 8 months ago when I bought my used C8. They need to make these things standard equipment.
Pingback: Collimate sct
Thank you very much for this info! I have had troubles collimating my SCT, tried this and it worked great! I used a 9″ x 11″ sheet of 6mm thick black foam from my local craft store. The sheet was only $1.99 and works well.
I can now collimate my scope with ease! Thank you!
Hi Milo,
Pleased to hear you found this useful. Enjoy your well collimated SCT and the amazing views it can provide of the universe.
Clear skies,
Matthew
Thank you very much for this useful information!
Best regards
Pedro
I am glad you found it useful. Enjoy a well collimated scope and all it can show you of the night sky.
Regards,
Matthew
Matthew, does it matter how thick the 3 outer cut-outs are?
I have realised that I did not include that information in the article after reading your question. They need to be off a sufficient size to let enough light through to be useable without making them too large that it does not reveal the three lines (i.e. if the cut outs approached the full size of the aperture). I am not sure there is a hard and fast rule, but to help give context, from memory on my 11” SCT, the windows are 1.3 inches wide. I will measure it tonight and if that is not correct I will let you know. I imagine a similar scaling could be applied to SCTs of different apertures. Hope this helps.
Pingback: SE 6 collimation
Pingback: Collimanating an SCT
I am a bit confused by image 4. Is that supposed to be a star or is it supposed to be the next step after the “Y” is achieved?
That is what would be seen when perfect focus is achieved, before the Duncan mask is removed from the scope.
Pingback: Bob's Knobs not fun and almost a disaster with rain
I am pretty surprised that no one with a 3d printer is making these masks, their is a bunch of people including myself who would buy one that is already made.
My advice is make these custom to order sell them on Cloudynights should be able to make a decent amount of money, I’d pay $50 + shipping.
A lot of people are just not good at diy stuff or just don’t have the stuff to do it.
At the end of the day having to buy the stuff to try and make one only to mess up a bunch of times before giving up you could’ve just bought one already made.
I am quite surprised as well these are not an available off-the-shelf accessory. Considering the number of SCTs in the wild, there is a large addressable market.
There is a commercial source for pre-fabbed Duncan masks:
https://www.ebay.co.uk/str/Morris engraving.
Shipping is expensive to the states since it is a UK manufacturer. $34.00 USD total for an 8 inch mask. If you are in the UK or Europe, I’m sure shipping is more reasonable.
Did you ever measure the exact size of the three slots ?
I am making one for a Meade LX 200 12 inch.
I should add that information. From memory, the cut-out slots were approx 1.3″ wide for my 11″ SCT.
Pingback: scope buy. meade/celestron/rc ?
I made one of these from a sheet of 5mm black craft foam from Hobby Lobby ($1.49). Easy to make and works well on my C11.
I will say that I think a tri-Bahtnitov works better in poor seeing.
Hi,
Very interesting this! I will be making one but i have a question please. You say a magnification of 400x range is needed… I have my 8″ celestron sct working at f10 just now with a ZWO533MC- pro for imaging. Can i just put a Duncan mask on my sct and get it collimated or do i need to put a barlow/powermate in the image train too?
Thanks!
Hi Stuart,
The reason for the 400x magnification is the duncan mask Y pattern is very small. You may well find using the imaging camera at f/10 and any ability you have to zoom in on the image will be more than enough.
Hope that helps,
Matthew
Many thanks! Kind regards, Stuart
Thank you for the info. Easiest collimated process ever.
Wow cool. I will definitely try this for collimating my 6sct. Thanks!